Introduction
This guide should cover everything you need to add the power of machine learning to your team - but if we missed anything or if you have any questions please feel free to reach out to us either via the chat-bot or by emailing info@aclysis.com.
About Aclysis
ACLYSIS is a web-based platform launched with the view of ACCURATE ANALYSIS. It’s an end-to-end solution podium programmed to run automatically or with parametric preference. User need not incorporate any code, the entire process is built on simple CLICK options.
It's built for common people and business entities those who are data-crafty.Create internal tools more quickly and inexpensively. It helps to recognize the elements that influence your company's performance. With the help of Aclysis, it's relatively simple to understand what's happening with your data and surface the essential variables that influence business outcomes.
It is imperative to have a clear view of forthcoming situations for progressive business planning. Nobody can predict future correctly. But most accurate prediction leads to more business growth. Customer and Product Segmentation plays a vital role in strategic decisions. For any business campaign and promotion, formulation of different business plans for different set of customers and different set of commodities are essential. ACLYSIS provides the automated platform to predict, forecast and segment according to the business needs.
Applications
VALUE PREDICTION
For any manufacturing or service industry, proper prediction of sales and profit is the backbone of their business strategies. Building of most accurate regression model is necessary to get that desired accuracy.
CUSTOMER AND PRODUCT SEGMENTATION
Customer and Product Segmentation plays a vital role in strategic decisions. For any business campaign and promotion, formulation of different business plans for different set of customers and different set of commodities are essential.
LABEL CLASSIFICATION
The options are endless: score leads, identify fraud, route calls, assess sentiment etc. Any data can be sorted and ranked using text or numbers.
TIME SERIES FORECASTING
Climate change, projected quarterly revenue, and stock prices - Simply feed the model the most recent data, and it will gradually produce future forecasts.
RFM
RFM analysis is a marketing approach that is used to statistically evaluate and group clients based on the frequency, total purchase made and recency of their most recent transactions in order to pinpoint the best customers and execute focused marketing campaigns.
SENTIMENT ANALYSIS
Sentiment analysis is the contextual mining of text that locates and extracts subjective information from the source material, assisting a company in understanding the social sentiment of their brand, product, or service.
Adding A Model
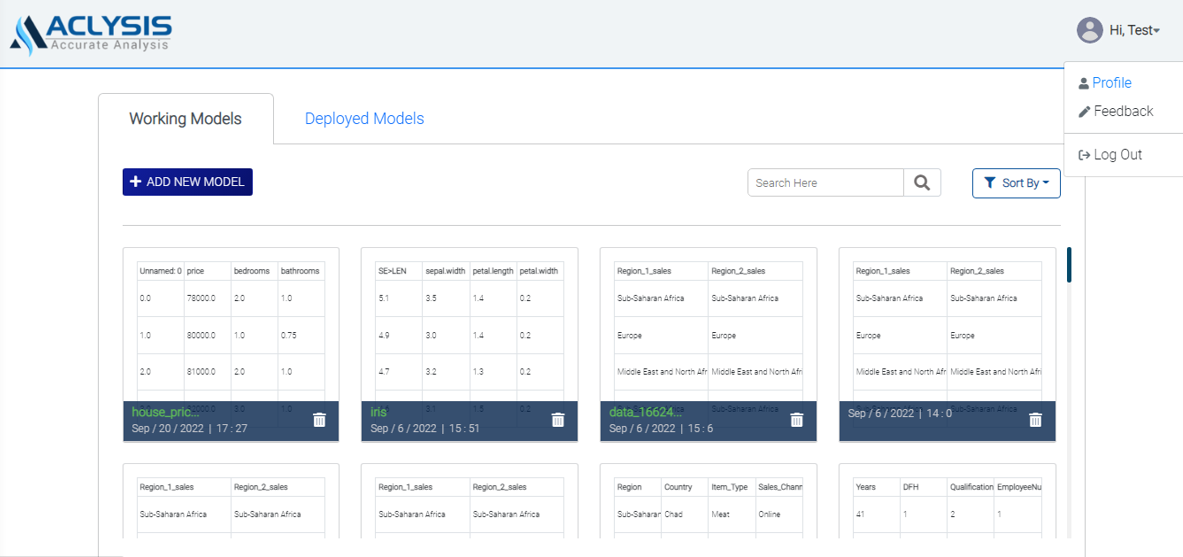
To create a model you must first log in with us. The home page will appear as shown below .

Once you click "Add New Model" on the home page, the user has to import data from Local database or External data connector. Data import will start and the follwing status will appear -
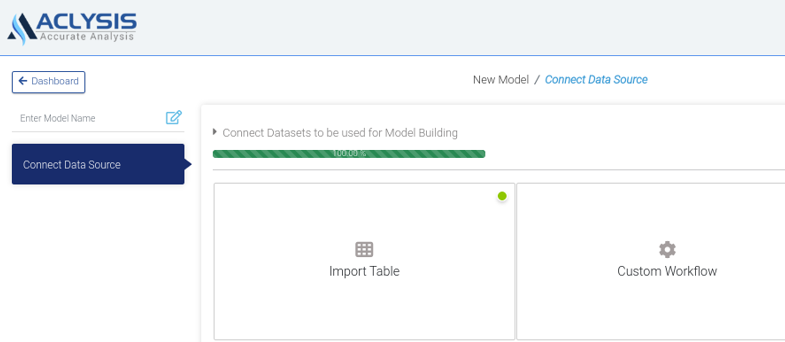
Connect Data Source
For model building, the user may use dataset stored in local data source or opt for connecting different data sources. The ETL functionality ( Custom Dataflow) has also been provided to have customized dataset merged from various data connectors.

Local Data Source
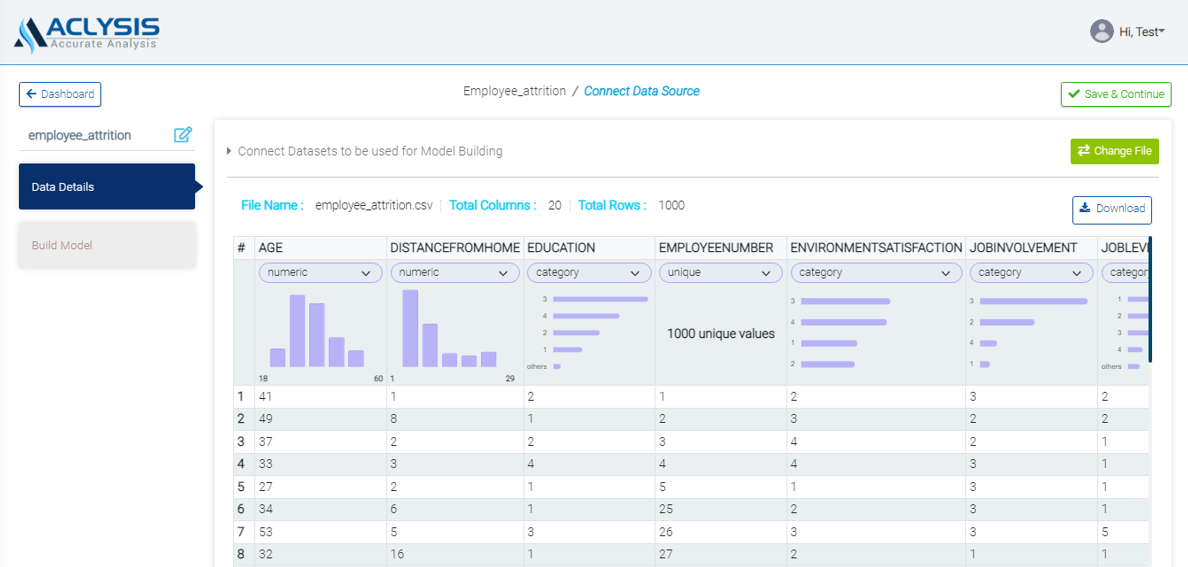
After upload the dataset by clicking on "Import Table." When it is uploaded, you will receive a scrollable preview of the dataset along with an overview that includes the number of rows, columns, the dataset name, the most recent upload date, and the distribution of each variable. So, the display of connect data source will be -
Data From MySQL
The MySQL connector makes it simple to create and deploy AI models using MySQL data by connecting your MySQL account straight to Aclysis. Simply choose MySQL in the "Connect data source" page and provide user credentials to connect data source from MySQL connector.
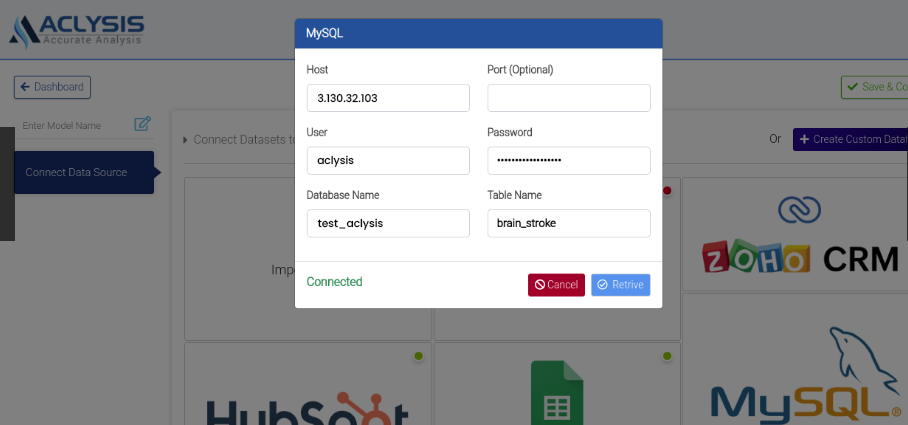
On connecting data source, the user will be prompted to Data Retrieval.
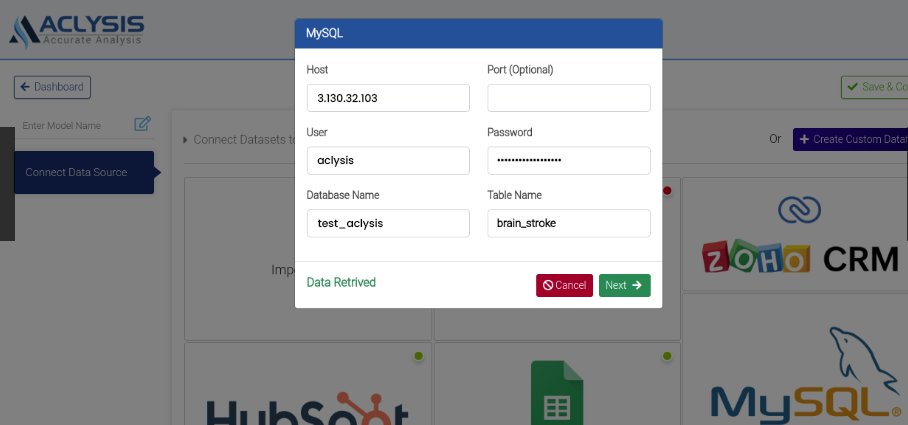
On retrieval, column wise data distribution and column data type along with basic data details will appear.
Data From Google Big Query
The Google Big Query connector makes it simple to create and deploy AI models using Google Big Query data by connecting your Google Big Query account straight to Aclysis. Simply choose Google Big Query in the "Connect data source" page and provide user credentials to connect data source from Google Big Query connector.
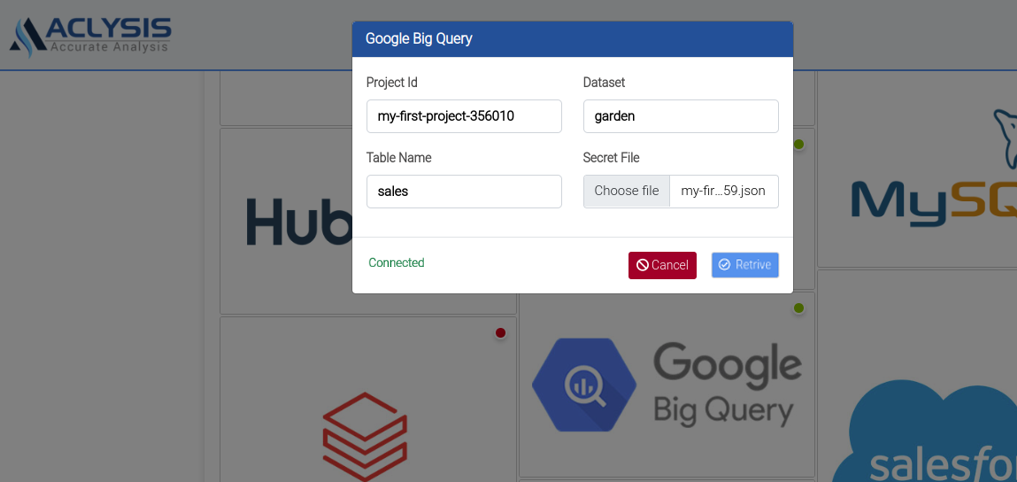
On connecting data source, the user will be prompted to Data Retrieval.
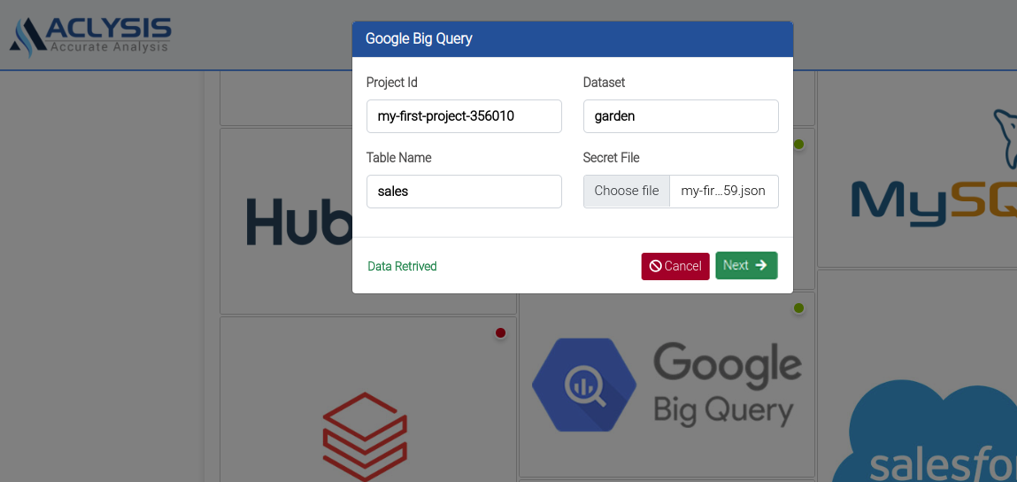
On retrieval, column wise data distribution and column data type along with basic data details will appear.
Data From Salesforce
The Salesforce connector makes it simple to create and deploy AI models using Salesforce data by connecting your Salesforce account straight to Aclysis. Simply choose Salesforce in the "Connect data source" page and provide user credentials to connect data source from Salesforce connector.
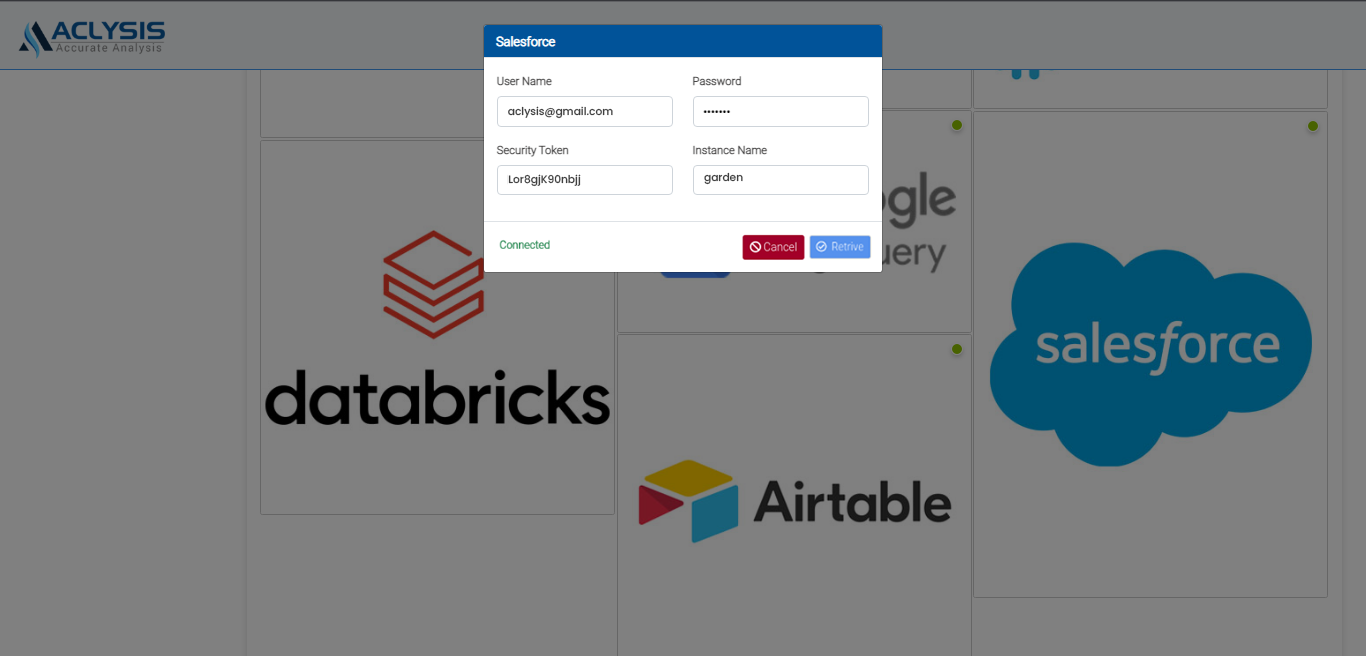
On connecting data source, the user will be prompted to Data Retrieval.
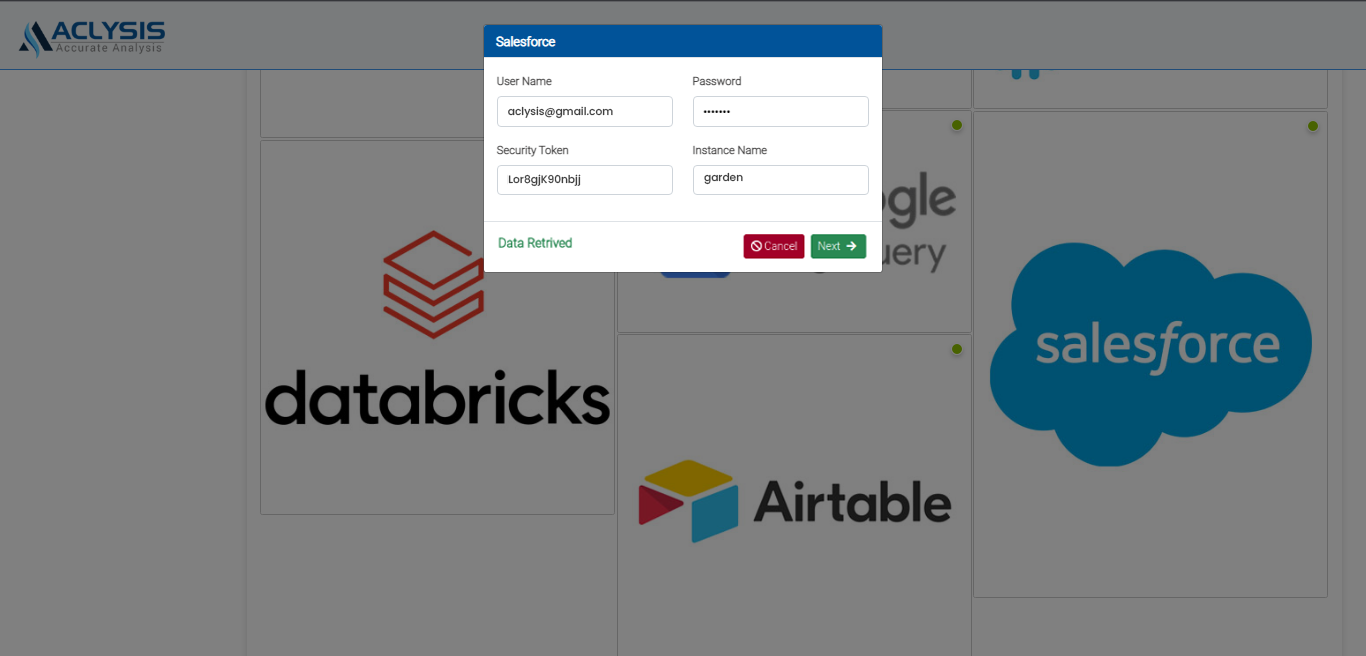
On retrieval, column wise data distribution and column data type along with basic data details will appear.
Data From Hubspot
The Hubspot connector makes it simple to create and deploy AI models using Hubspot data by connecting your Hubspot account straight to Aclysis. Simply choose Hubspot in the "Connect data source" page and provide user credentials to connect data source from Hubspot connector.
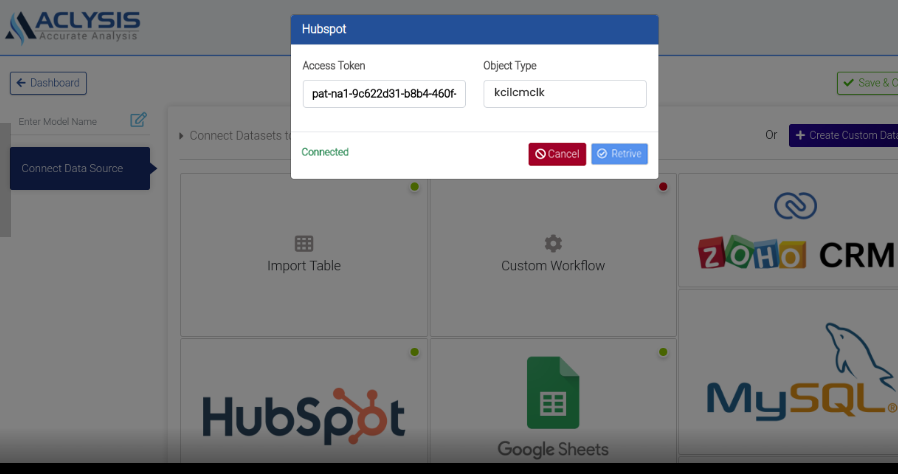
On connecting data source, the user will be prompted to Data Retrieval.
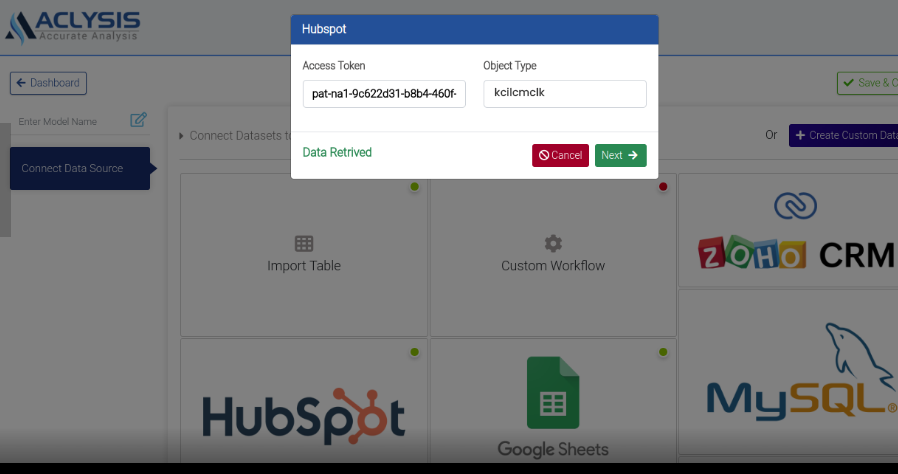
On retrieval, column wise data distribution and column data type along with basic data details will appear.
Data From Snowflake
The Snowflake connector makes it simple to create and deploy AI models using Snowflake data by connecting your Snowflake account straight to Aclysis. Simply choose Snowflake in the "Connect data source" page and provide user credentials to connect data source from Snowflake connector.
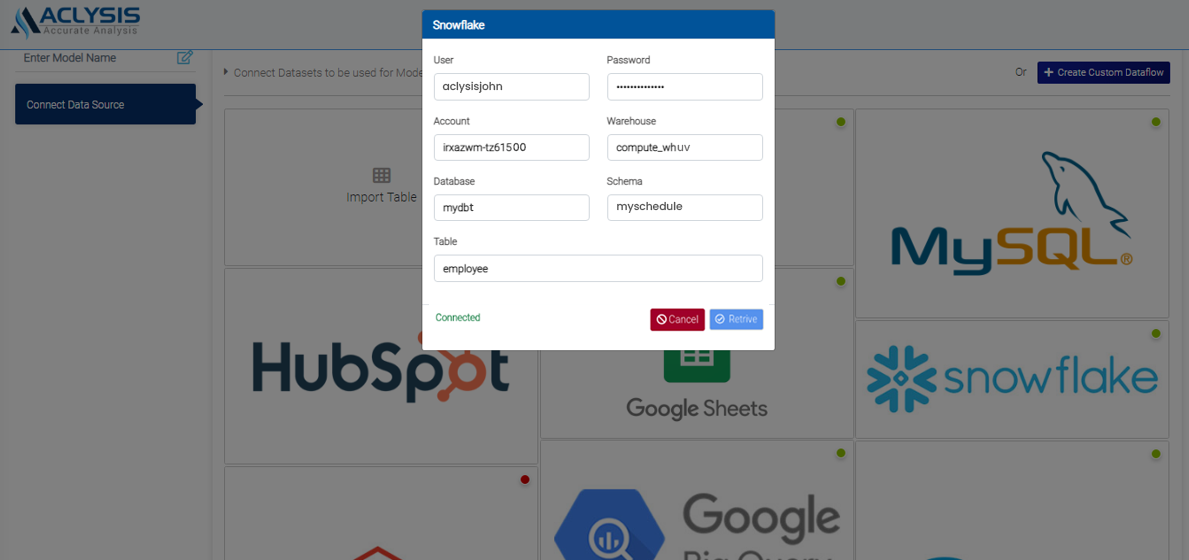
On connecting data source, the user will be prompted to Data Retrieval.

On retrieval, column wise data distribution and column data type along with basic data details will appear.
Data From Airtable
The Airtable connector makes it simple to create and deploy AI models using Airtable data by connecting your Airtable account straight to Aclysis. Simply choose Airtable in the "Connect data source" page and provide user credentials to connect data source from Airtable connector.
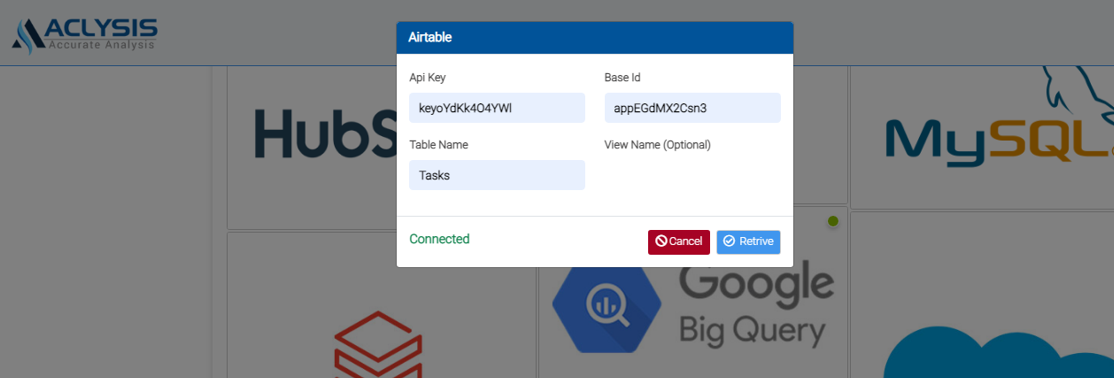
On connecting data source, the user will be prompted to Data Retrieval.

On retrieval, column wise data distribution and column data type along with basic data details will appear.
Data From Google Sheets
The Google Sheets connector makes it simple to create and deploy AI models using Google Sheets data by connecting your Google Sheets account straight to Aclysis. Simply choose Google Sheets in the "Connect data source" page and provide user credentials to connect data source from Google Sheets connector.

On connecting data source, the user will be prompted to Data Retrieval.
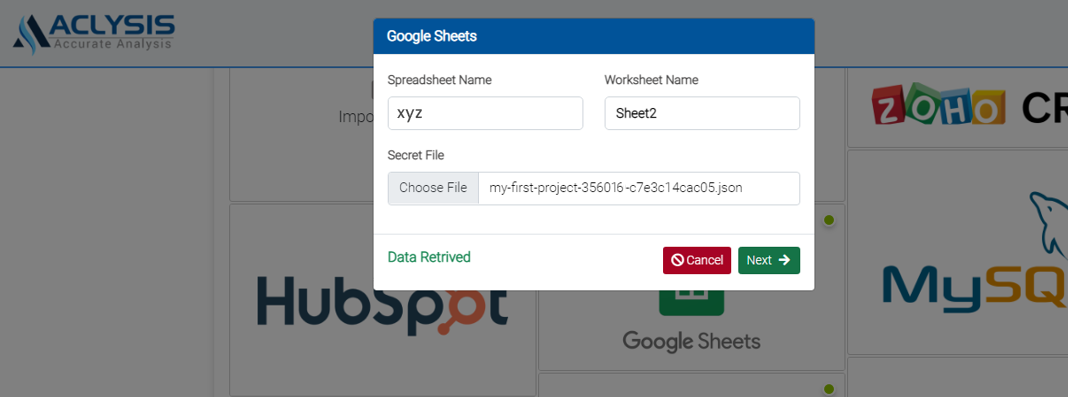
On retrieval, column wise data distribution and column data type along with basic data details will appear.
Data From Zoho
The Zoho connector makes it simple to create and deploy AI models using Zoho data by connecting your Zoho account straight to Aclysis. Simply choose Zoho in the "Connect data source" page and provide user credentials to connect data source from Zoho connector.
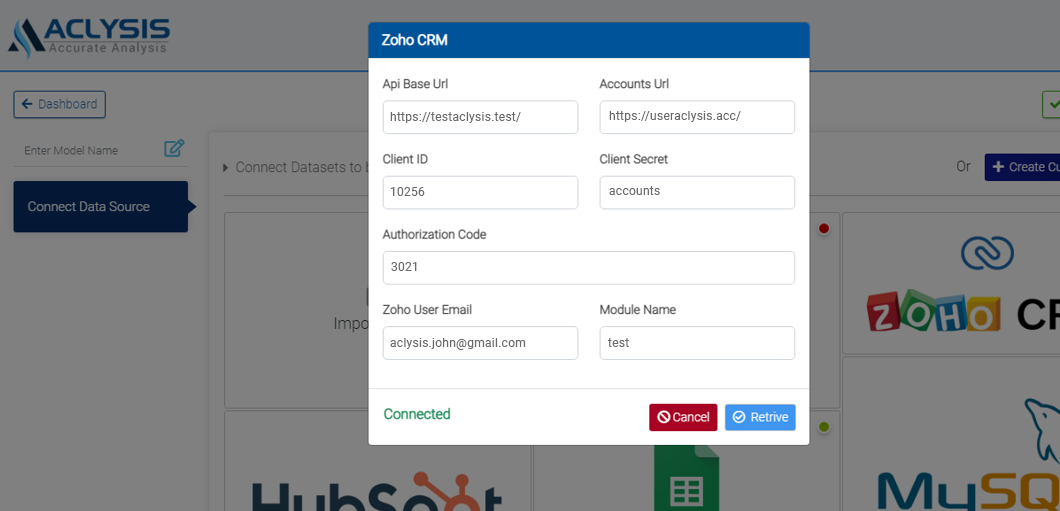
On connecting data source, the user will be prompted to Data Retrieval.
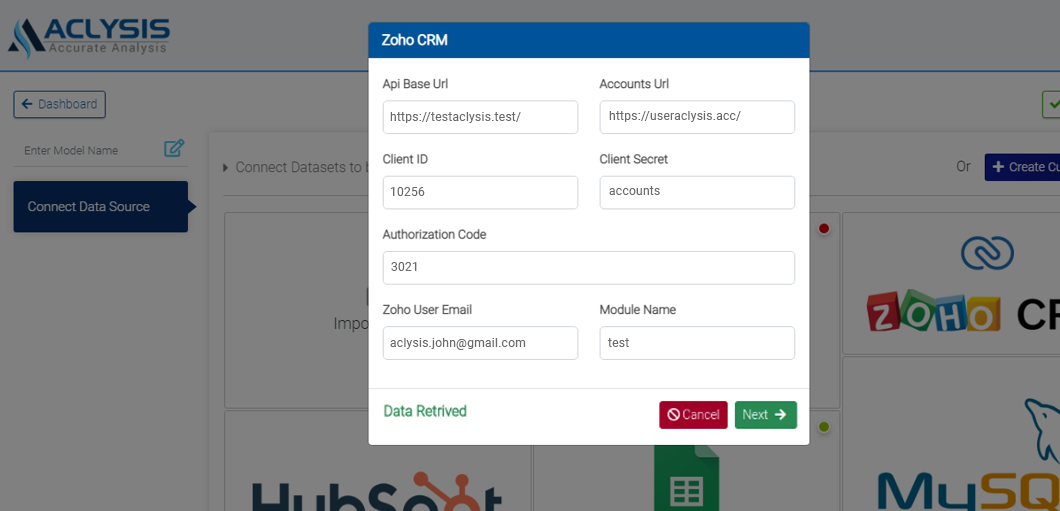
On retrieval, column wise data distribution and column data type along with basic data details will appear.
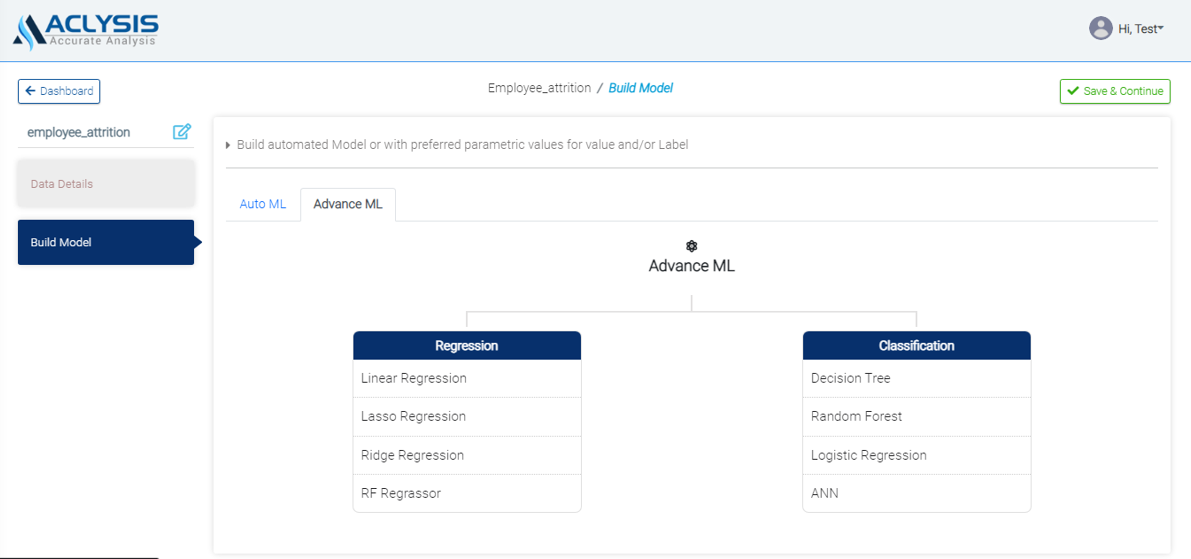
Build Model
"Build Model" where a model is built and results are obtained, click "Save & Continue." You must pick the features you wish to use to build the model and the target variable in this phase. You will have a variety of model choices to consider. Before running the Advanced Model, you will be required to select the parameter values.

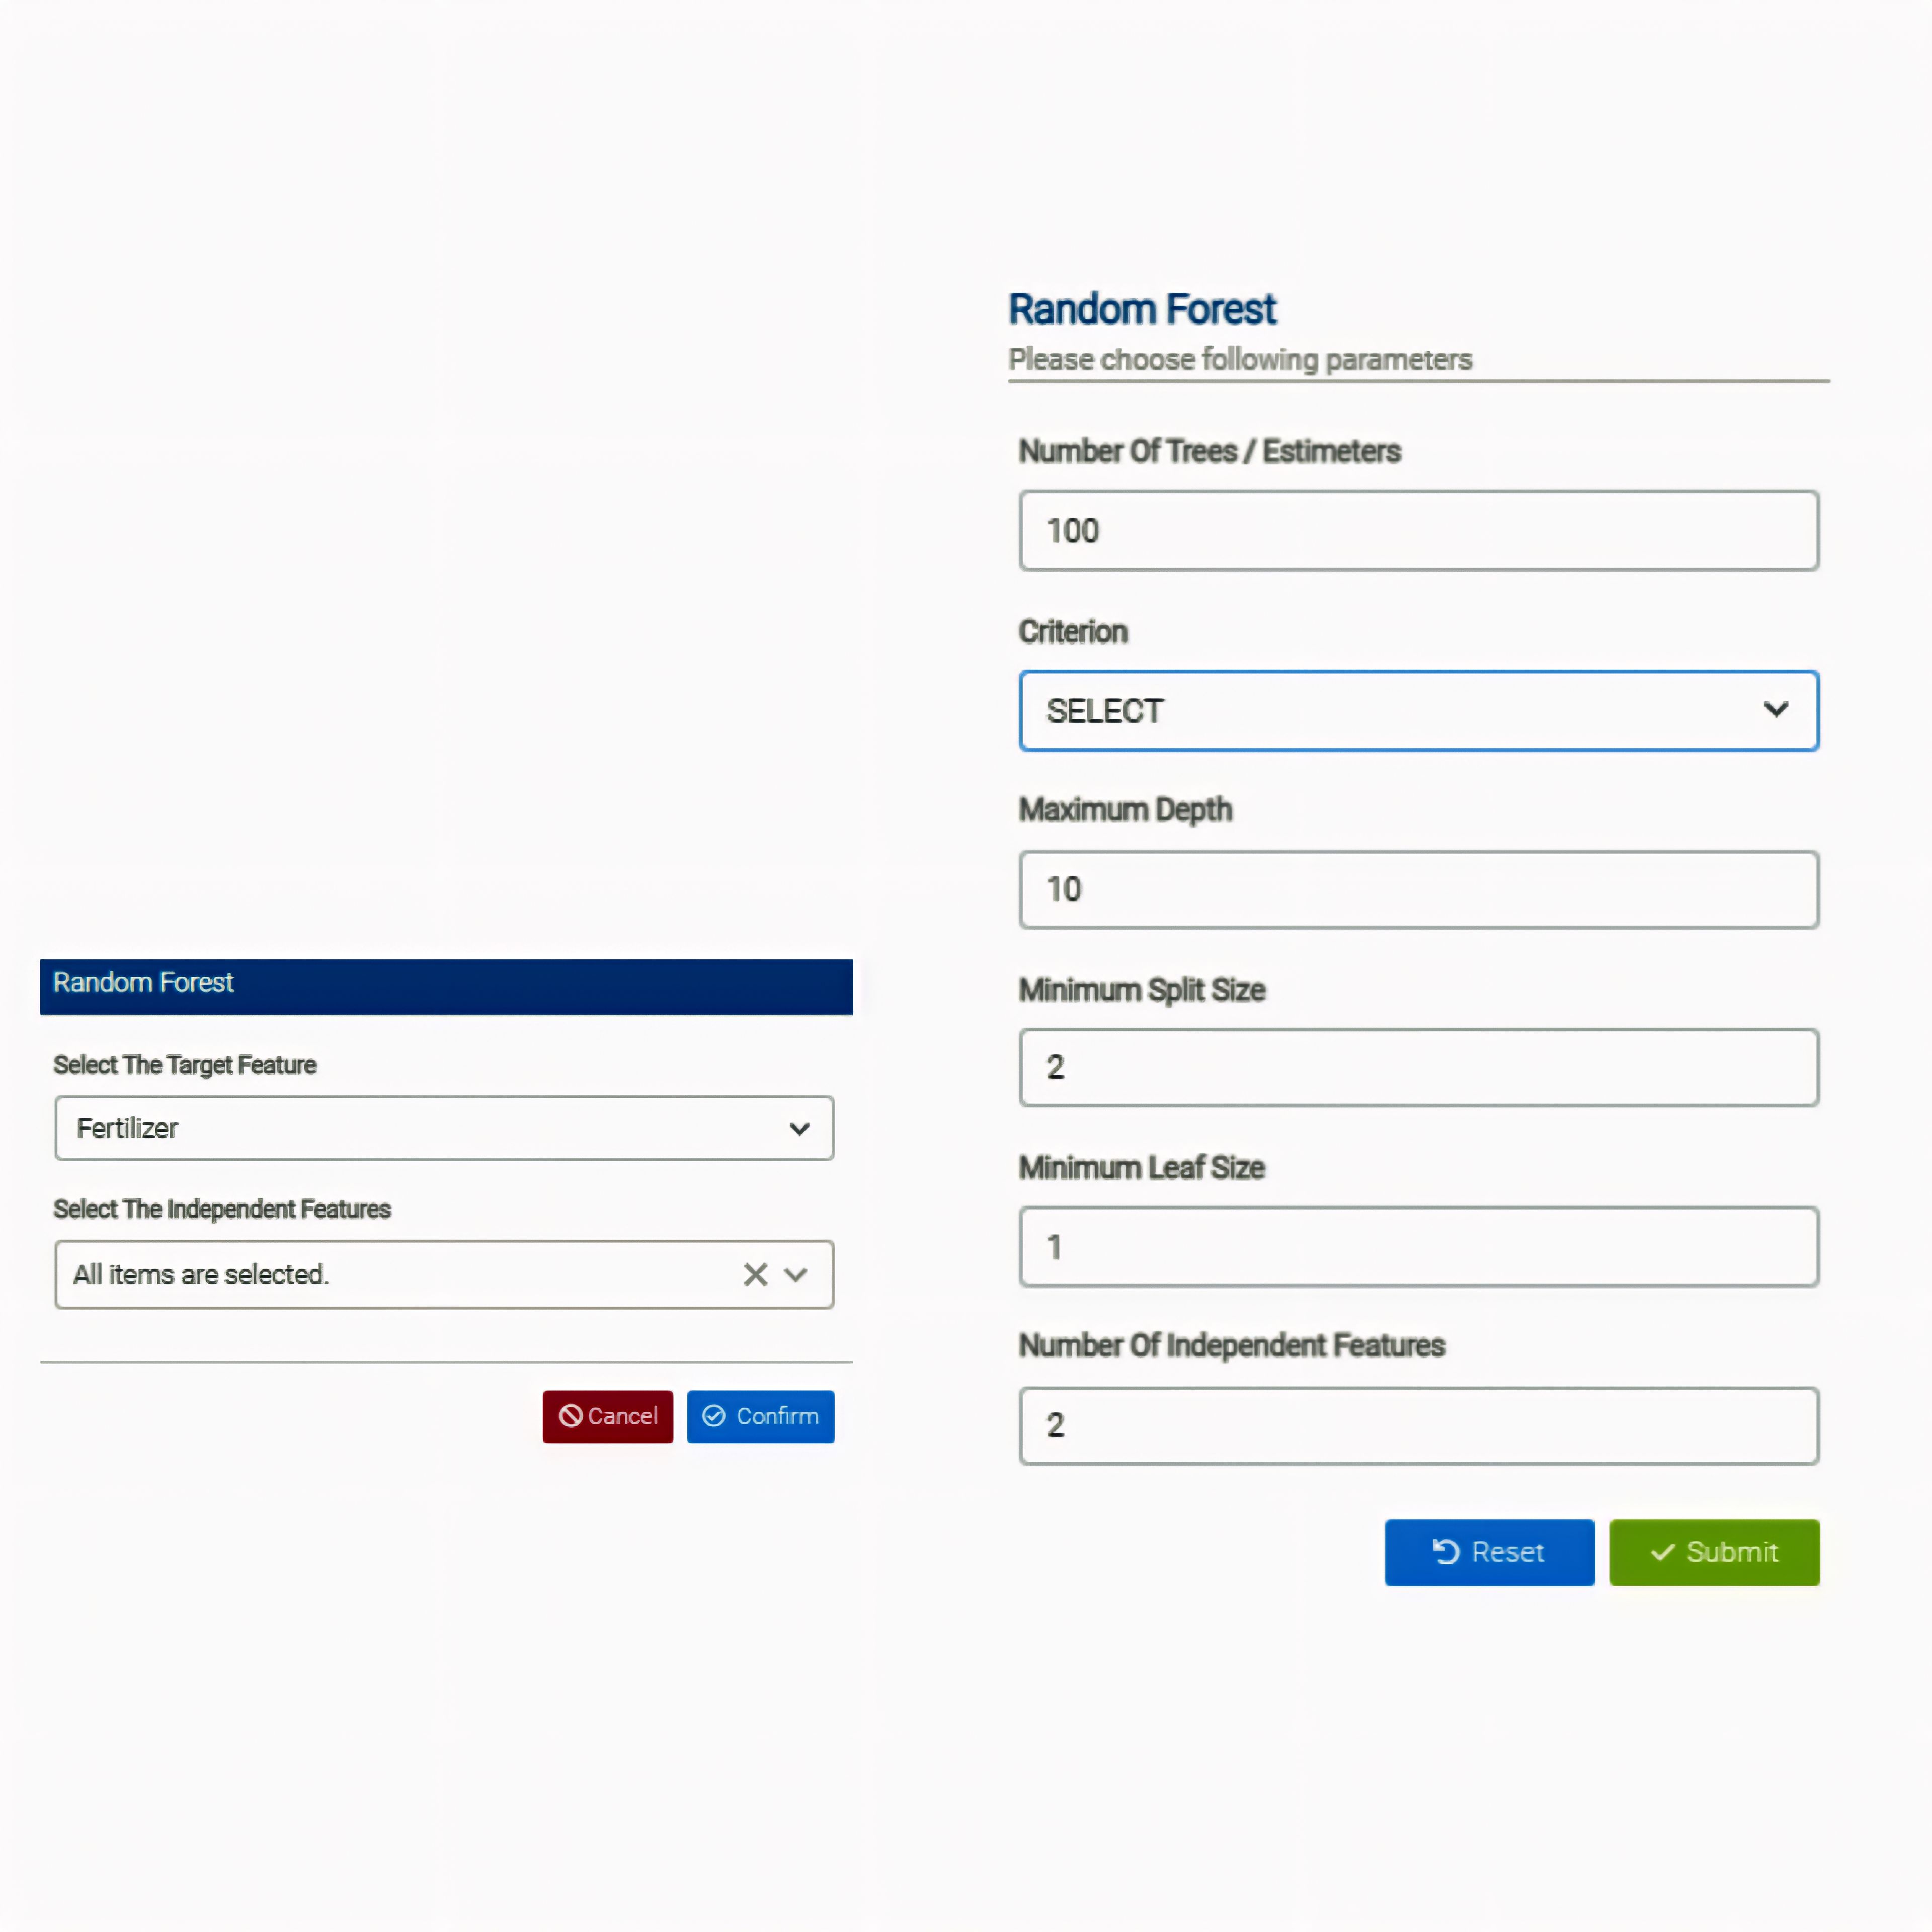
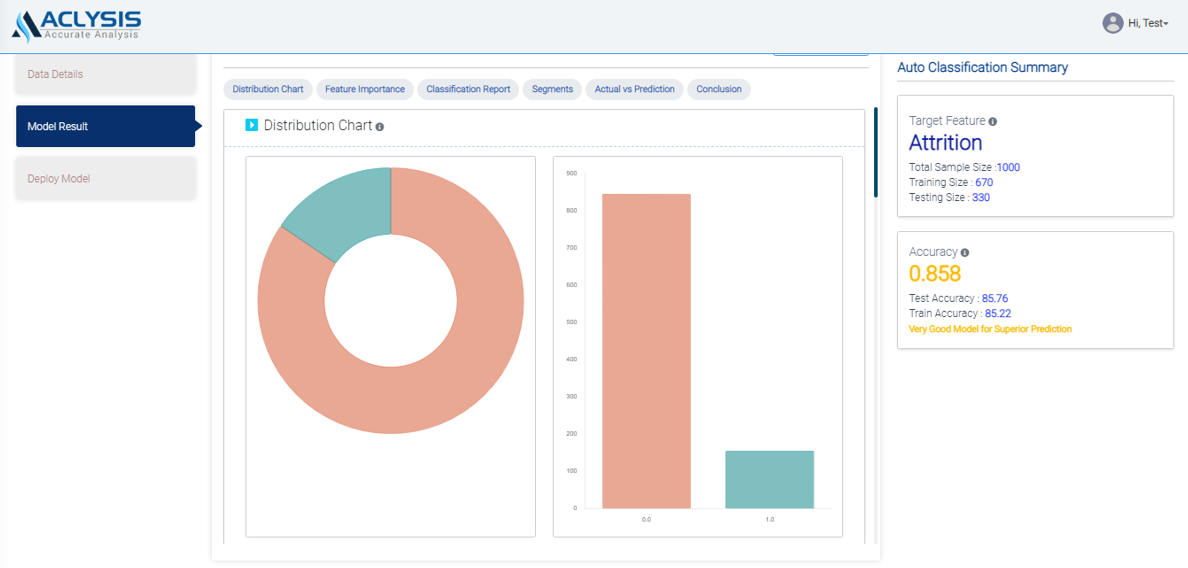
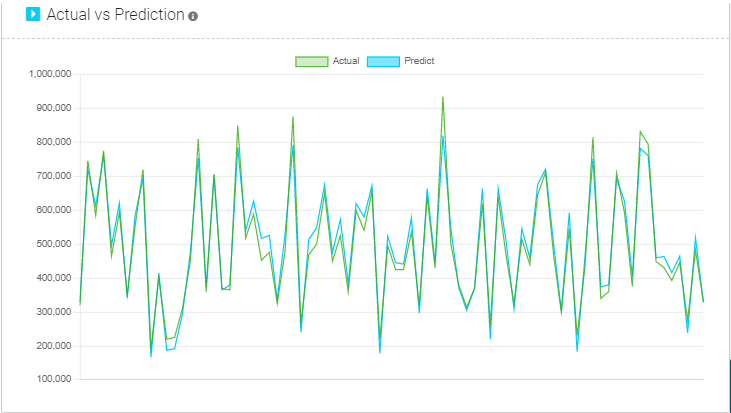
As soon as you submit the form, the model will automatically build, and you will see the following display with model accuracy and various visuals, such as the target variable distribution and dispersion, coefficients and their significance, segmentations, and an accurate vs. prediction plot, among other things.


Deploy Model
It's time to use the model we've created in the actual world. Using Aclysis, deploying sophisticated machine learning models is simple. To deploy using a web app, you click "Deploy Model." For example, if you select "Web App," you will be asked to provide feature inputs. As soon as values are provided, the prediction for the target variable is quickly shown. You can upload a file and get the matching forecasts in tabular form instead of entering a single set of numbers. Here is an example of a deployment page with a csv file.
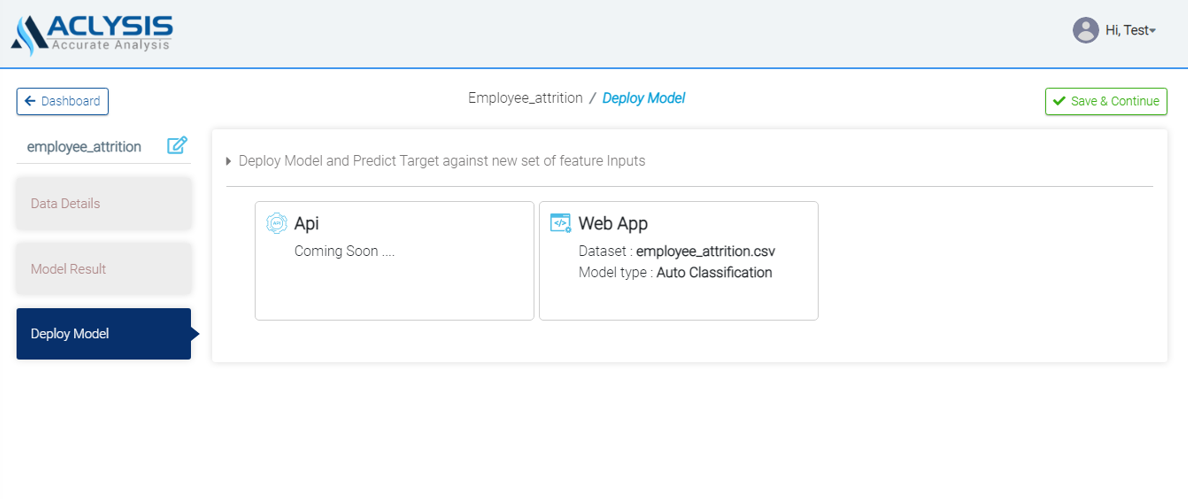

Any numerical feature of your interest can be predicted using the same procedures we used.
ETL
The user can use dataset from various data source connectors like MySql, Google Big Query, SalesForce etc. For this purpose, Aclysis has introduced "Custom Dataflow" option which is available in "Connect Data Source" Page. The module is user friendly with "Drag and Drop" methodology without any code or any algorithms.The user can merged datasets from single/multiple connectors to make their own dataframe with relevant columns.
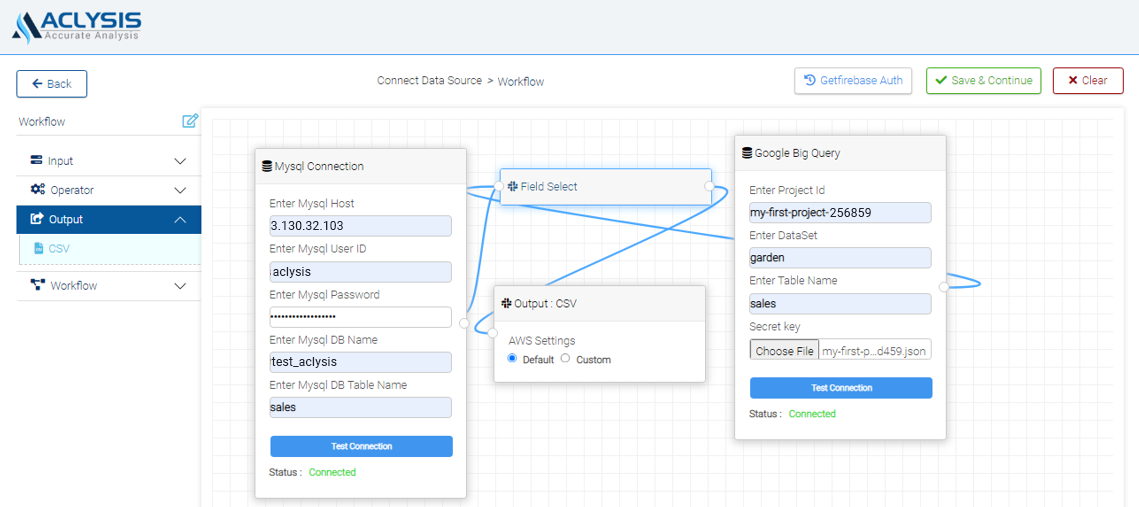
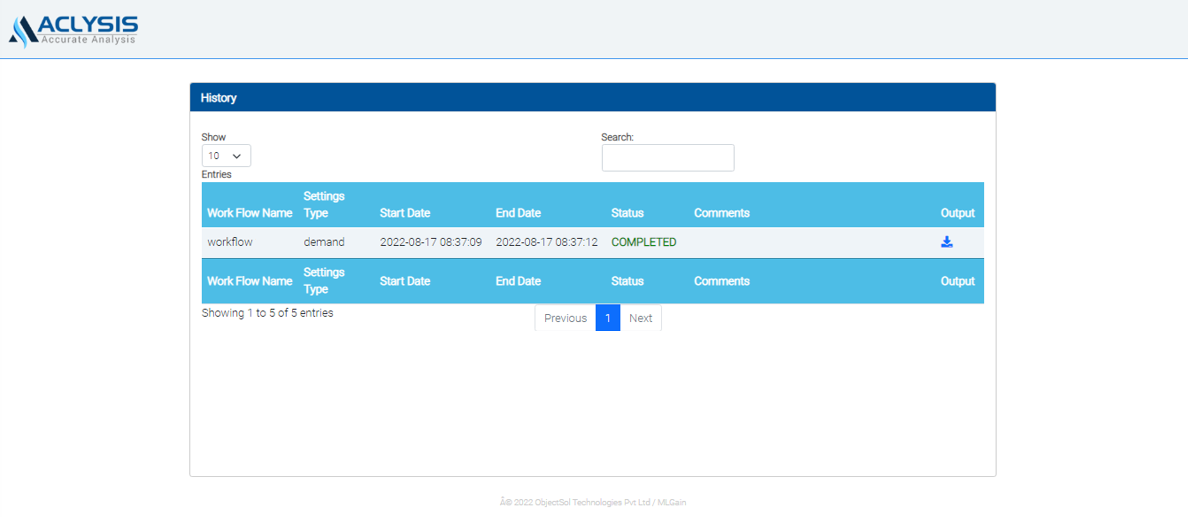
Choose "Setting" from the options under workflow name to schedule data connection On demand or Scheduled. The data will be saved as per the scheduled task and the same can be retrived from history page as shown below -
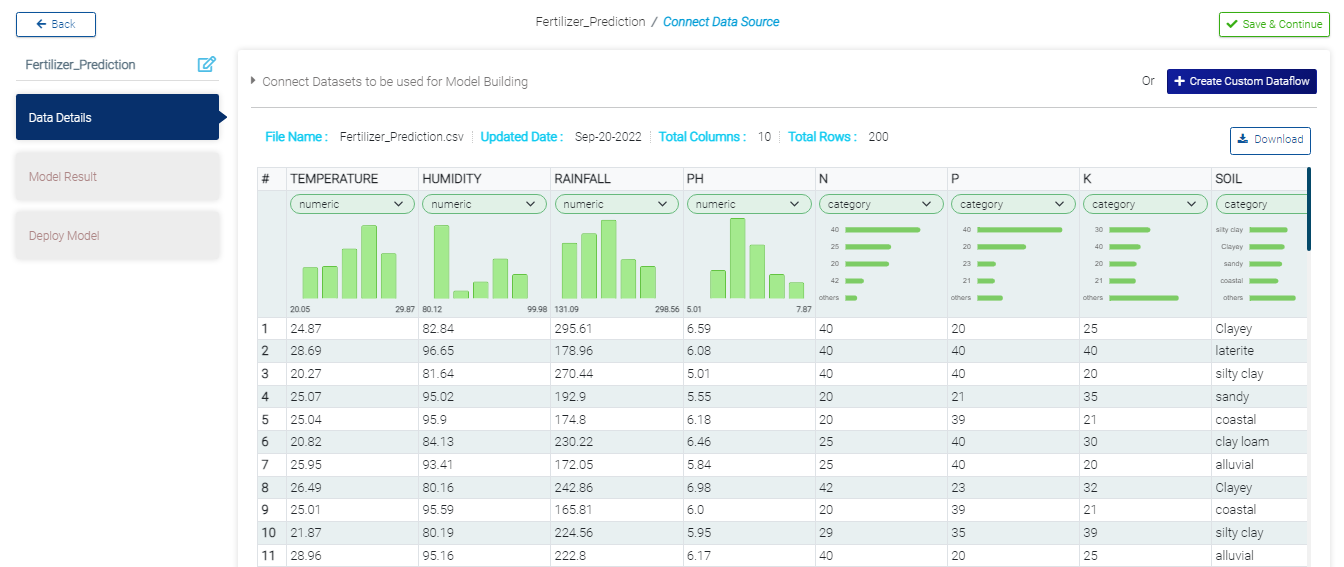
Data Details
Whatever models you built on a particular dataset, will be stored and to access those you are to click 'History' button.

On history page, you will have 'Data Deatails' option instead of 'Connect Data Source'. you will receive a scrollable preview of the dataset along with an overview that includes the number of rows, columns, the dataset name, the most recent upload date, and the distribution of each variable.
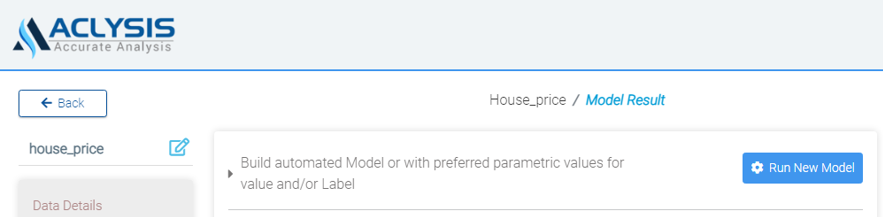
Model Result
In Model History page, you can see the output page containing the model accuracy measurements and other visuals and tables related to the corresponding model built.

Run New Model & Deploy Model
You can opt for running a new model on the same dataset by clicking on 'Run New Model'. This will prompt you to the same page for 'Build Model' and you have to follow the same sequence of new model building, model result & deploy model.
Deployment History
Deployed model will show you the history of the deployment of built model in chronological order. You can view the deployed result correspond to a particular model by clicking on "Web App" button.

Profile
Your Profile page features your personal information, including your name and email, your plan, your usage, any integrations you’ve set up and more. This page is accessible by clicking the “Profile” tab under the drop-down in User Tab in the top-right of Aclysis.
In this page the following fields are available -
Overview
The “Overview” section tells you your email and your account creation date.

Plan
The “Plan” section tells you what plan you’re on: Either Free Plan, Standard Plan, Premium Plan or Customize Plan. You can click “Upgrade” to seamlessly upgrade to any plan.

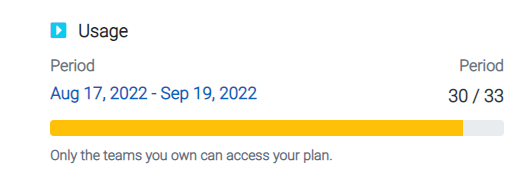
Usage
The Usage section tells you how long your plan is still valid.
Profile
The “Profile” section tells you your name. You can update your first and last name in Aclysis under the “Profile” header. This will change the name on any Aclysis invoices, emails or other communication you receive.

Notification
You can choose to receive emails about new features and other news.

Feedback
Your Feedback page features your feedback types, title and description. This page is accessible by clicking on the “Feedback” tab under the drop-down in User Tab in the top-right of Aclysis.

Log Out
This page is accessible by clicking the “Log Out” tab under the drop-down in User Tab in the top-right of Aclysis.

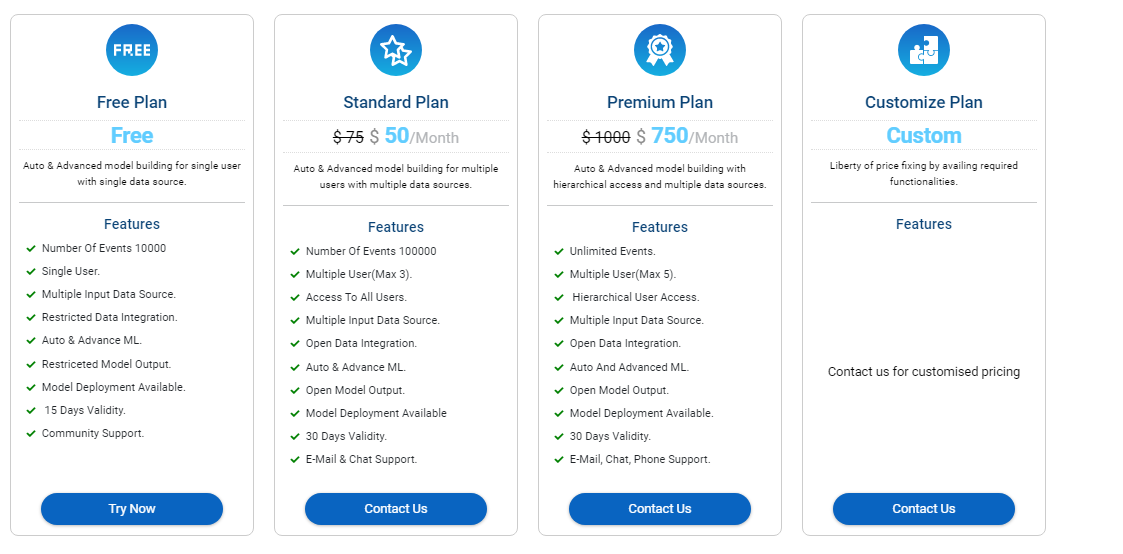
Subscription Plans
You can manage your subscription plan through your Profile Settings, under the “Plan” section. There are 3 primary Aclysis Plans: Standard, Premium and Customize.
An event is the use of any functionality of Aclysis like prediction, data merger, deployment or in general when the Aclysis acts upon a record of your data. Whenever you send a row or record to your ML template and send back a result, it counts as a single event. For example: Query a model through the deployment of a Web page will count as a single event. Train a dataset for model building or sending a unique record to the API and returning a result count as one event. Uploading a CSV with 100 rows of data and producing prediction results for each row counts as 100 actions. Merging two databases with 100 rows is 100 actions.
A request to upgrade your plan will be made. You will pay a prorated sum for the remainder of the month if you decide to upgrade. Your models might pause till your events reset the next month if you don't upgrade(e.g. if your subscription began on 10th of the month, your event count will reset on the 10th of each month).You can upgrade whenever you want. You will pay a prorated sum for the remainder of the month if you decide to upgrade.
The end-to-end activities that runs from data input through model deployment is called a model. There is no restriction; you can make as many models as you like. The restriction is only over the number of events. There is no cap; you may upload and import an unlimited amount of data. We don't charge for stored or submitted data. We have the right to impose storage space restrictions on individual accounts if we discover situations in which the platform is not used as intended.